Shop My Etsy Shop for Handmade Gifts!

Sunday, April 10, 2011

Love Owls

My latest creation was for a bridal shower. Molly's colors are Melon Mambo and Certainly Celery. I thought the owls would be so cute to represent a couple! I love using embossing folders to add texture to cards and I even embossed the flap on the envelope too! Supplies used: Two Step Owl Punch Two Step Bird Punch Modern Label Punch Itty Bitty Shapes Punch Pack Perfect Polka Dots Embossing Folder Framed Tulips Embossing Folder Basic Pearls Jewels Melon Mambo Cardstock Certainly Celery Cardstock Shimmery White Cardstock Basic Black Cardstock Chocolate Chip Cardstock scraps of DSP Happy Stamping & Knitting!

Boobies and Butts!

Wasn't sure how to label this post! But this is all I could think of. I wanted to make something fun for a friends bridal shower. These cookies fit the bill! See it's a heart cookie cutter turned upside down! Happy Stamping & Knitting!

Friday, March 25, 2011

Hungry Girls Pineapple Upside Down Cake!

I admit I have a sweet tooth......dessert just seems to be one of the things I miss the most on WW. So I am always looking for ways to enjoy a dessert now and again! Hungry Girl came up with the recipe for a Pineapple Upside Down Cake! (here) I knew my Demarle at Home Flower Mold would work well for this cake!!!! There are 8 petals to the mold and this cake has 5 ppv for WW with 8 servings to a cake! How perfect is this! Easy way for portion control! And the best thing about Demarle is how easy things come out of the pan! I baked it, let it cool, and then turned it out onto a pretty plate. Now much left in the pan, and a quick was with soapy water, and a shake to dry it, I am done! I just have to stay away from it! Taking it for a pot luck dinner at a friend's house tonight! YUM! Happy Stamping & Knitting!

My Digital Studio Birthday Invites

I can finally share this! We threw my Dad a surprise party for his 80th birthday. I created the invitations in MDS. I scanned the photo from his high school graduation and used it for the invite. The background is the same picture, just faded out some. What do you think? I was very happy with how they came out! I was able to print two to a page on Very Vanilla cardstock, and them cornered rounded each and mounted them on to Soft Suede Cardstock! So easy and fun! Happy Stamping & Knitting!

Tuesday, March 22, 2011

Wish Big!

This card was fun to make! I cut circles of black with various circle punches and glued them down to a Crumb Cake layer. I then ran the whole thing through the Big Shot with the Square Lattice Embossing folder. This makes the circles look embedded! The stamp set used is from the Occasions Mini called "Bring on the Cake". I love how it all came together. Here is the front and the inside with a close up of the main image. Supplies: Bring on the Cake Stamp Set Basic Black, Crumb Cake, Very Vanilla Cardstock Circle Punches Riding Hood Red marker Basic Black ink Tab Punch Antique Brads Sponge Square Lattice Embossing Folder Big Shot Happy Stamping & Knitting!

Monday, February 21, 2011

Flower Power!

I loved the Tootsie Pop flowers that Kay made here. Mom asked for a favor idea for their Sigma Beta Phi Founder's Luncheon coming up in April and I knew these would be perfect! So I grabbed all my retired card stock and headed to my parents house for the weekend. Mom had two of her friends and members come over to help make them. Mom and I had pre-cut all the flowers and had them ready to go in bowls, separated in bowls. We had a few laughs, but were able to make 60 of them in less than two hours. The only thing left for them to do is bend up the petals before the event.
Happy Stamping & Knitting!

Tuesday, February 15, 2011

Wedding Invites

My best friend since high school's daughter Nikki is getting married. I told her I would make her invites and they are now complete! So 130 invites are done and in her hands ready to be mailed. It was a long process with the embossing of each one but I love how elegant and beautiful they are. The colors are Basic Black and Melon Mambo and they are embossed with the Vintage Wallpaper Textured Impressions Embossing Folder. I used the corner rounder to soften up the corners. I did save time by taking the cardstock to Fedex once it was formatted and had them print and cut them for me. It cost about $23 to have it all done! What a time saver! And I like the way the ink printed better than what my printer here at home did. Nikki came over today, and we worked all day to get them done! So I think she is happy with them and of course, they are one of a kind, and made with our own hands! Happy Stamping & Knitting!

Saturday, February 12, 2011

Occasions Mini card

It has been a while since I have posted anything here. Sooooo sorry! I am in the process of purging and re-vamping my stamping studio and it is taking me much longer than anticipated! GRRRRRR.... DH asked me to make him two sympathy cards for relatives of co-workers. I LOVE our new Framed Tulips embossing folder in the Occasions mini. I paired it with another set in the mini catalog called Thanks for Caring! Products used were: Thanks for Caring Stamp Set Framed Tulips Embossing Folder Pear Pizzazz ink pad Very Vanilla cardstock Pretty in Pink 5/8" Taffeta ribbon sponge dimensionals Scallop Punch-non SU Happy Stamping & Knitting!

Thursday, December 09, 2010

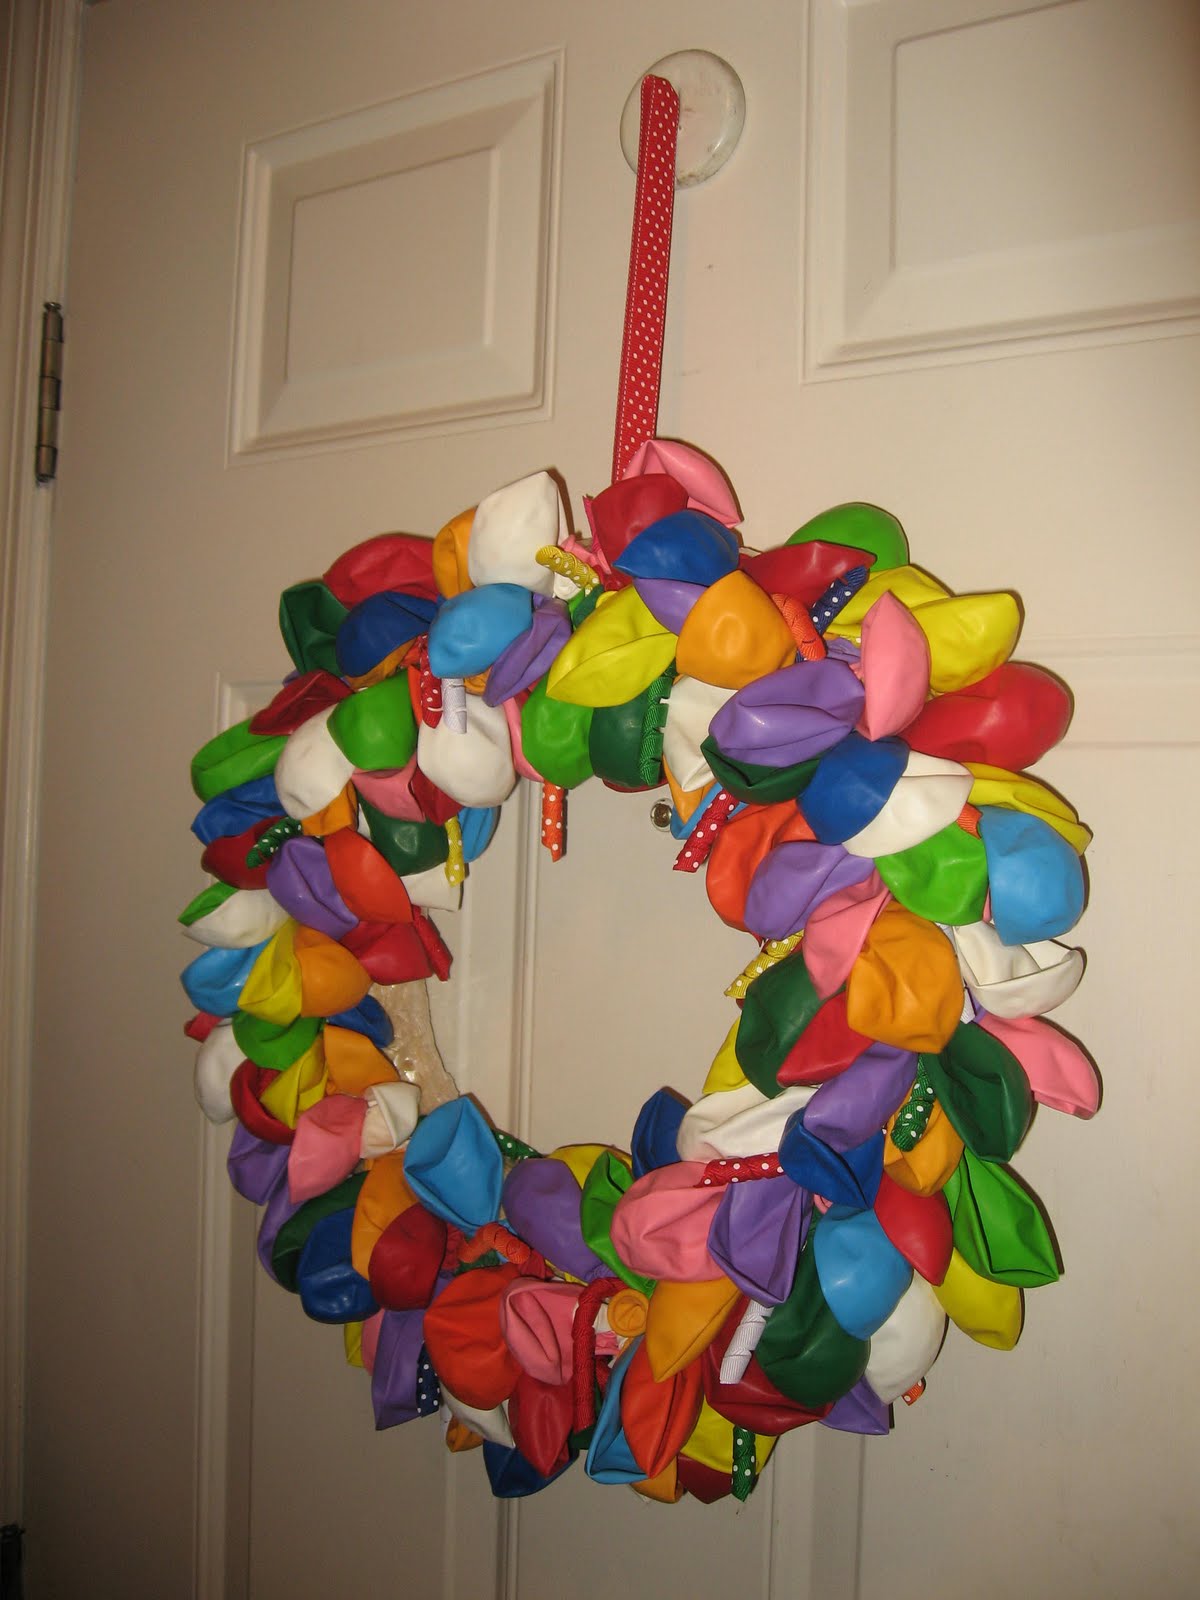
Celebration Balloon Wreath

Want a fun way to adorn your front door, hall mirror or just about anywhere to honor the birthday boy or girl? Then you need a Celebration wreath! These were so fun to make! (Glad I am not allergic to latex!) They are in my Etsy shop for sale! Great gift for teachers too! What child wouldn't want the honor of hanging the birthday wreath on the classroom door for their special day! The label on the wreath was made using My Digital Studio. I love how this wonderful software we have has soooo many digital stamps, paper, accessories to make projects like this easier and faster to do! I just used the same balloon image and just changed the color and orientation! So fun and easy to do! For whatever reason, Blogger is rotating the pic below. When I view it in my pics it's fine but not here! So the pic is sideways, but you can still see what I did! Happy Stamping & Knitting!